Charpy Impact Test: Definition, History, Importance, How To Calculate, and Procedures
Learn more about this type of impact test and when to best use it.

The Charpy impact test was first developed in the 1900s to advance the understanding of why materials fail prematurely. This test determines how much energy a material absorbs during fracture and can thus be used to determine the impact strength of a material. The test is comparative, which means that the impact strengths of various materials can be compared with each other, provided they were tested using the same standard. The test is relatively simple and involves striking a notched sample with a swinging pendulum. The height of the pendulum before and after the impact is used to determine how much energy was absorbed by the sample.
This article will describe what the Charpy impact test can say about a material, who first invented the test, the general test procedure, and the type of results that can be expected.
What Is the Charpy Impact Test?
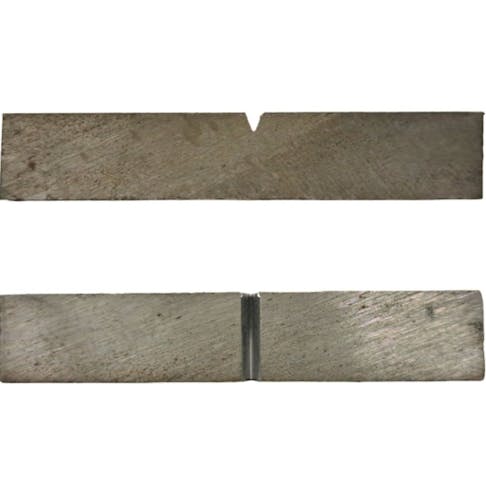
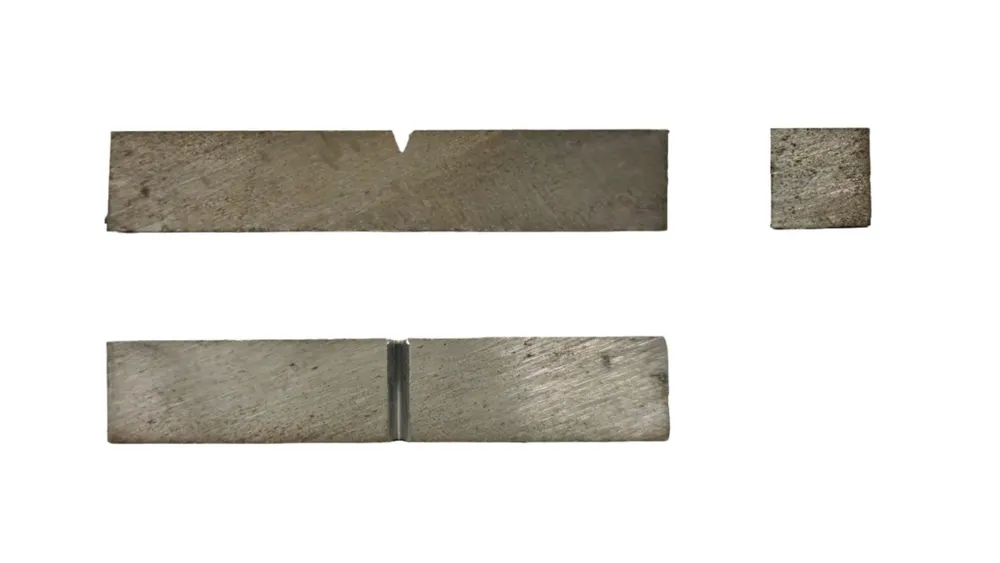
The Charpy impact test, sometimes called a V-notch test, is a comparative-style test used to define a material’s impact strength by determining how much energy is required to fracture a pre-prepared and standardized sample with a V-notch machined into it. See Figure 1 below:
An example of a Charpy impact test.
Image Credit: Shutterstock.com/Ali Balayev
A pendulum is released to strike the specimen. The height of the pendulum before and after passing through the sample is used to calculate the energy absorbed during the fracture process. For ductile materials, the test can be performed at multiple temperatures to determine the DBTT (Ductile-to-Brittle Transition Temperature). The Charpy test only determines the total energy expended during the fracture process. It does not provide any granular detail about the energies required during the various phases of fracture such as fracture initiation and propagation. However, the Charpy impact test is a very cheap and easy-to-perform test. Ultimately, the Charpy test can be used to determine if a material is brittle, i.e., if a material requires more energy to fracture, then it can be considered ductile, and less energy indicates a brittle material. The nature of the sample's fracture surface can also be analyzed to determine if it is a ductile or brittle material.
What Is the History of the Charpy Impact Test?
The Charpy impact test was invented by George Augustin Albert Charpy in 1901. The test was created to discover why machines such as steam boilers, steam engines, and military armaments were failing prematurely. Charpy improved upon the pendulum-based approach first developed by S.B. Russell. He discovered that adding a notch into the sample helped improve the accuracy and sensitivity of the test. The test was ultimately named after Charpy as he was responsible for various standardization efforts and technical improvements.
What Is the Importance of the Charpy Impact Test?
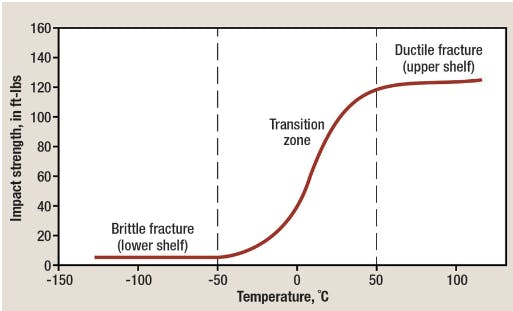
The Charpy impact test is important as it gives engineers a comparative result for the impact strengths of various materials. When a material is tested across a range of temperatures, the DBTT (Ductile-to-Brittle Transition Temperature) can be plotted on a graph giving engineers an understanding of at which temperature a normally ductile (i.e., tough) material will become brittle.
How To Calculate Charpy Impact Test?
The results from the Charpy impact test essentially refer to an energy balance. The terms consist of the potential energy before the test—which is the weight of the pendulum at a certain height above the sample—and the potential energy remaining after the pendulum has passed through the sample and moved to a new height above the sample. This difference in energy is presented as joules (J) and refers to the energy absorbed by the sample during fracture.
What Is the Formula for the Charpy Impact Test?
Most Charpy impact testing machines are graduated to directly indicate the energies involved. As such, equations are generally not needed. However, the formula used to determine the impact energy is as follows:
KV = mgH1 - mgH2 - Ef
Where:
- KV - Impact energy
- m - Pendulum mass
- g - Gravitational constant
- H1 - Initial height of the pendulum
- H2 - Final height of the pendulum
- Ef - Energy loss due to friction
What Is the Unit for Charpy Impact Test?
Charpy impact test results are measured in joules, which is the SI unit for energy. This is simply the amount of work performed by a 1-newton force pushing a sample by 1 m in the direction of the force. This value can be used to calculate the impact energy in J/m2 by dividing the joule value by the sample's cross-sectional area at the sample notch.
What Are the Step-by-Step Procedures of the Charpy Impact Testing?
To perform a successful Charpy impact test the following procedure must be followed:
- Prepare Samples: The samples must be prepared with dimensions according to the relevant standard. There are multiple standards used. However, in general, the sample size is 55 x 10 x 10 mm with a V-notch machined in the middle of the sample. The exact shape of the notch is also indicated in the relevant standard. The testing standard will also dictate how many samples must be tested.
- Measure Sample: The sample must be accurately measured with a vernier caliper to determine the area of the sample at the notch. This will be required to calculate the impact strength.
- Calibration: The apparatus must be calibrated by releasing the pendulum without a sample in the machine. This determines how much energy is absorbed by friction.
- Set up Sample: The sample must then be carefully placed into the testing machine. The sample should be handled with tongs to ensure that no body heat is transferred into the sample or to prevent injuries with very cold or very hot samples.
- Position Pendulum: The pendulum must then be raised to its initial position and secured with the locking mechanism.
- Release the Pendulum: The pendulum can be released and will then travel through the sample, fracturing it.
- Note Energy: Most Charpy testing machines will have a dial graded in joules. The energy absorbed must be divided by the cross-sectional area of the sample at the V-notch to calculate the impact strength. The unit of impact strength is J/m2.
- Repeat Test: If it is desired to determine the ductile-to-brittle transition temperature, the tests can be repeated at multiple temperatures to plot the impact energy vs. temperature.
- Prepare Report: Finally, a report can be prepared to note the test procedure, the standard used, and the test results.
Which Machine Is Used in Charpy Impact Testing?
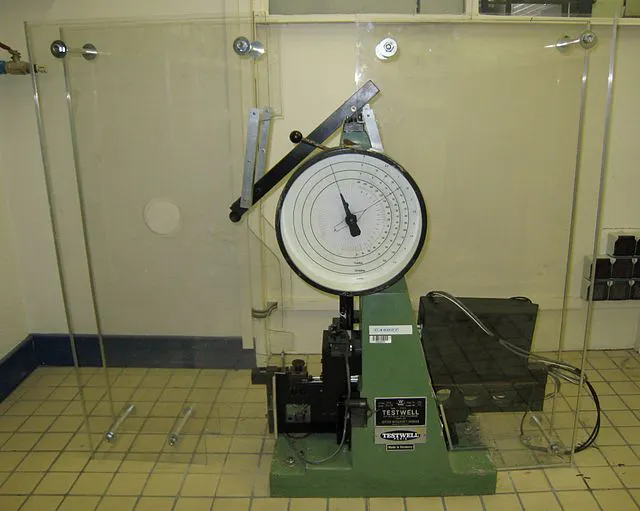
A Charpy impact testing machine is used to test the impact strength of a sample. Figure 2 below shows a typical testing machine:
Charpy impact test testing machine.
Image Credit: https://commons.wikimedia.org/
The machine is relatively simple and works by swinging a pendulum into a sample to fracture it. The energy absorbed by the sample is read from a dial on the machine.
What Is the Charpy Impact Test Standard?
The Charpy impact test can be performed to several standards. However, the most common are ASTM E23, ASTM A370, and ISO 148-1. ASTM A370 only focuses on steel whereas ASTM E23 and ISO 148-1 are for metallic materials in general.
What Is the Temperature for Charpy Impact Test?
The standard temperature for Charpy impact testing is 23 °C. However, these tests are often performed at many different temperature ranges to plot the materials' ductile-to-brittle transition temperature.
What Are the Two Types of Charpy Impact Test Results?
The results generated by performing a Charpy impact test can be categorized as listed below:
1. Quantitative Results
Quantitative data is data based on numerical values. In the Charpy impact test, this quantitative data is normally the energy absorbed during the fracture of the sample. The DBTT (Ductile-to-Brittle Transition Temperature) can also be estimated by testing the multiple samples at multiple temperatures to see where there is a drastic increase in required impact energy, as shown in Figure 3 below:
DBBT graph.
Image Credit: https://www.industrialheating.com/
2. Qualitative Results
Qualitative data is non-numerical observational data. In the Charpy impact test, this refers to the observation of the fracture surface of the sample. For example, a brittle sample will have a flat fracture surface, whereas a ductile failure will typically have a rough surface with increased deformation. However, it becomes difficult to accurately state the nature of the failure when both failure modes are present in the sample, which is often the case. In these situations, the amount of surface area related to the ductile and brittle failure is measured.
What Is the Charpy Impact Test Used For?
The Charpy impact test is used to determine several properties such as the impact energy of a sample, whether or not a material exhibits ductile or brittle behavior, and at which temperature a material transitions between ductile and brittle failure modes.
What Does the Charpy Impact Test Measure?
The Charpy impact test measures the amount of energy required to rupture a sample in joules (J). This is done by measuring the potential energy before and after the pendulum has struck the sample. This value must be divided by the cross-sectional area at the notch to get the impact energy in J/m2.
What Are the Factors Affecting Charpy Impact Test?
The Charpy impact test can be affected by several factors; four of the most important are listed below:
1. Yield Strength
In general, as a material's yield strength increases, its impact energy will decrease. In other words, materials with higher yield strength will generally have lower toughness. Materials that can plastically deform before ultimate failure are considered to be tougher.
2. Notch
The V-notch specimen is used when the material is brittle and a U-notch specimen is used when the material is ductile. The U-notch specimen has a higher stress concentration factor than the V-notch specimen. It should be noted that these notches must be precisely the same to get accurate results that can be compared with past tests.
3. Temperature
The Charpy impact tests are typically performed at 23 °C. However, higher and lower temperatures are used to plot a curve representing a material’s ductile to brittle transition behavior. Higher temperatures will increase impact strength.
4. Fracture Mechanism
There are two fracture mechanisms, namely cleavage, which is common in brittle materials, and microvoid coalescence, which is more common for ductile materials. Materials that fracture via the cleavage fracture mechanism will have lower impact energy than those that fail via microvoid coalescence.
Is Charpy Impact Test Important in 3D Printing?
Yes, performing Charpy impact tests on 3D printed samples can help engineers determine the impact strength of various 3D printing materials, especially considering that some technologies print parts with anisotropic properties. Testing samples with different print geometries can help engineers understand how to optimize their designs for impact strength. For more information, see our guide on Everything You Need to Know About 3D Printing.
What Is the Charpy Impact Test Result in High-Strength Material?
A high tensile strength material like tungsten has a comparatively low impact strength as it is highly brittle.
What Is the Charpy Impact Test Result in Low-Strength Material?
Low tensile strength materials like low carbon steel will generally have higher toughness as they can absorb more energy without fracturing and are more ductile.
What Is the Difference Between Charpy Impact Test and IZOD Impact Strength Test?
The key difference between the Charpy impact test and the IZOD impact test is how the sample is secured. For the Charpy test, the sample is supported on two sides and the pendulum strokes the middle of the sample. In the IZOD test, the sample is supported on only one side, i.e., in a cantilever configuration, and the pendulum strikes it on the opposite side.
Summary
This article presented the Charpy impact test, explained what it is, and discussed its importance and how to calculate it. To learn more about the Charpy impact test, contact a Xometry representative.
Xometry provides a wide range of manufacturing capabilities, including 3D printing and other value-added services for all of your prototyping and production needs. Visit our website to learn more or to request a free, no-obligation quote.
Disclaimer
The content appearing on this webpage is for informational purposes only. Xometry makes no representation or warranty of any kind, be it expressed or implied, as to the accuracy, completeness, or validity of the information. Any performance parameters, geometric tolerances, specific design features, quality and types of materials, or processes should not be inferred to represent what will be delivered by third-party suppliers or manufacturers through Xometry’s network. Buyers seeking quotes for parts are responsible for defining the specific requirements for those parts. Please refer to our terms and conditions for more information.


