How to Check Thread Depths
Accurately measuring the depth of an internal thread can be a challenging and time-consuming process. This short guide provides a step-by-step set of instructions for you to follow when measuring thread depth, helping you minimize the risk of recording inaccurate measurements.

Accurately measuring the depth of an internal thread can be challenging and time-consuming. The proper depth of thread on an internally threaded part is critical to ensure that the mating part will seat properly against the face of the tapped hole once they are assembled.
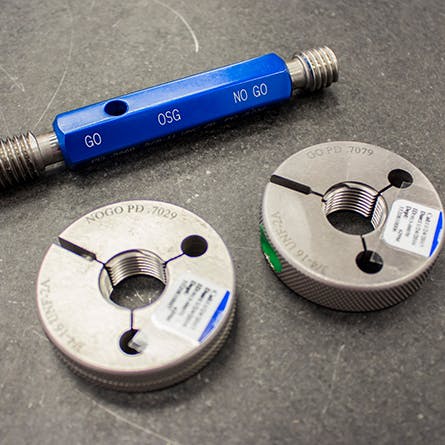
To check thread depth, you typically need a thread depth gauge. Whether digital or analog, these devices provide objective measuring scales to indicate the depth of thread. They also provide repeatable results if handled with care, used as designed and regularly calibrated.
Checking Thread Depth
Consistent and accurate results can be obtained if the person taking measurements follows a structured approach. By diligently following the steps below, you can minimize your risk of recording inaccurate measurements.
Step 1 - Part Familiarization
The person taking measurements should be familiar with the part to be measured. This includes identifying the thread to be measured and identifying features that may interfere with taking measurements (like other parts obscuring the thread). Reviewing a technical drawing should provide sufficient information. Where a drawing is unavailable, closely inspect the part itself.
Step 2 - Inspect Thread for Cleanliness
Ensure the thread and the hole to be measured are free from swarf, cooling liquid (or oil), other contaminants like dirt, or any other debris. Such debris can easily get trapped in the threads, and occasionally even the broken-off tip of a tap head can be stuck at the bottom of a blind hole. Any of these can:
- Affect the accuracy of measurements.
- Jeopardize the user’s ability to identify damaged threads.
- Damage a measuring tool.
Step 3 - Inspect Thread for Damage
Check whether the threads are damaged. Thread damage can occur at the start of the thread if the workpiece was dropped, or another object impacted it. A damaged or blunt tap can also produce deformed threads.
FREE CNC Machining Design Guide
Step 4 - Determine Thread Type and Size
The thread type and size should be displayed on the part’s technical drawing. If this information is missing, contact the draftsman or engineer to confirm the thread size.
Alternatively, determine the thread size using an internal vernier caliper to measure the inner diameter of the thread, and a thread pitch gauge to measure the thread pitch. Once this information is known, use a thread chart to determine the thread size.
Take care to note whether the thread is metric or not. Metric thread gauges measure the distance between threads, whereas thread pitch gauges for British and other European threads measure the number of threads per inch.
Step 5 - Check Thread Handedness
The handedness of thread refers to the direction the male part must turn to engage the threads. Find the lead in of the thread and determine if it is counter-clockwise (for left-handed) or clockwise (for right-handed). Using the opposite-handed measuring tool will make it impossible to take measurements.
Step 6 - Check Measuring Tool Calibration Status
Once the thread size and handedness are known, select the appropriate measuring tool. It is critical to check the calibration status of the measuring tool before use. An uncalibrated tool can produce inaccurate measurements, jeopardizing product quality.
Do not use an uncalibrated measuring tool. If a calibrated tool is not available, follow your organization's escalation plan and notify the relevant parties.
Step 7 - Measure Thread Depth
Follow organizational procedures or measuring-tool manufacturer guidelines and measure the thread depth. Depending on the part’s features and physical size, you may first need to secure it to a solid, stable work surface.
Step 8 - Record Measurement Result
Once a measurement has been taken, record it for future reference. Most organizations have detailed procedures on where measurements are to be recorded. If such a procedure does not exist, record the measurement results either by hand in neat writing or electronically in a spreadsheet. Store copies of the measurements for future reference.
Following the above step-by-step process will enable your organization to accurately and consistently check thread depths. Do you measure and check thread depths differently? Contact us if you feel you need more information about thread measurement.
