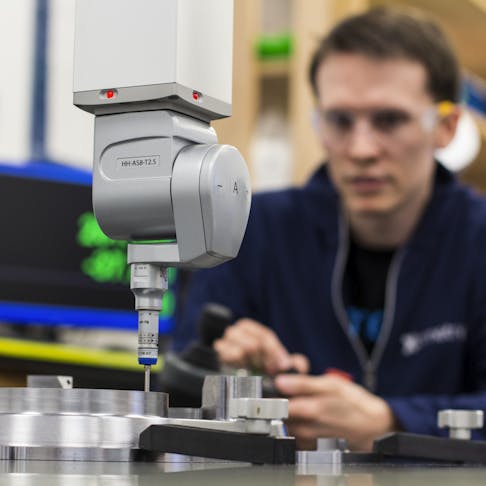
How to Select the Best CMM for Your Machine Shop
The accuracy and repeatability of your measurements are as important to your product output as the quality of your actual manufacturing tools.

Modern manufacturing operations increasingly depend on the performance of Coordinate Measuring Machines (CMM’s). The accuracy and repeatability of your measurements are as important to your product output as the quality of your actual manufacturing tools. There are several criteria to consider when selecting a CMM for your shop to ensure accurate and repeatable measurements:
Measuring Range
A CMM’s measuring range is primarily determined by the physical size of the largest part to be measured. However, the configuration of the part and the inspection routine may require the use of measuring probe extensions or holding fixtures. This may significantly increase the minimum measuring range. As a guideline, the CMM’s X, Y, and Z measuring ranges should be twice the length, width, and height of the largest part to be measured.
Accuracy
Environmental conditions like temperature, floor vibrations, and contaminants (dust, dirt, oil, etc.) can affect a CMM’s measuring accuracy. CMM manufacturers usually specify ideal atmospheric conditions and deviating from these may affect the CMM’s accuracy. To compensate for this, we recommend applying an acceptable ratio of maximum permissible error to tolerance, which represents the maximum error a CMM can have on a measurement compared with the tolerance of the measurement being taken. Ratios typically range from 1:3 to 1:20, with 1:5 and 1:10 being the most common. To maintain a 1:5 ratio the maximum permissible error of the CMM must be 1/5th of a dimension’s tolerance.
Types of CMM
A CMM’s probe arm orientation determines its type. There are five types of CMM:
Bridge
This is the most popular type of CMM. The probe arm is vertical and suspended on a horizontal beam supported by two vertical posts forming a bridge-like structure over the part to be measured.
Cantilever
The probe arm is mounted vertically on a horizontal cantilever which is itself mounted to a rigid structure. The probe arm moves vertically while the cantilever cannot move vertically. Machine rigidity limits the size of the cantilever, so they are primarily used to measure small parts.
Gantry
Gantry CMM’s are similar in construction to bridge-type machines, but are much larger and used to measure very large parts. Vertical support columns of gantry CMM’s are floor-mounted and require substantial foundations specified by the manufacturer to ensure rigidity and accuracy.
Horizontal-Arm
A horizontal-arm CMM looks similar to a cantilever CMM, but with its motions inverted. The probe arm moves horizontally while the entire cantilever moves vertically. Horizontal-arm CMMs are used to measure very large parts such as vehicle bodies.
Articulated-Arm
The articulated-arm CMM has an articulated multi-axis arm that allows the measuring probe to be positioned in many different directions. The articulated-arm CMM is very popular for portable measuring machines.
Types of Probes
The type of probe fitted to a CMM will have as big an effect on the quality of measurement as any other criteria we have discussed so far. Probes are divided into two main categories:
Contact Probes
Contact probes are contained in a probe housing. They consist of a stylus that is attached to a bearing plate which is then connected to a pressure sensor. Contact probes physically touch the part when taking a measurement. These probes can be further classified into two subtypes:
- Touch trigger probe - intermittently touches a part to measure individual points.
- Analog scanning probe - dragged across a part to measure contoured surfaces.
Non-Contact Probes
Non-contact probes are used where it is not possible for the measuring probe to physically touch parts, such as for very small parts or deformable parts. There are two types of non-contact probe:
- Laser probe - uses a laser to triangulate coordinates.
- Vision probe - uses a high-definition camera to generate many measurement points for comparison against an electronic model.
